The audio playlist is a native WordPress feature and can be used in the classic editor, or block editor using the classic block. It uses mp3 files uploaded to the media library and very similar to creating an image gallery. In order to create an audio playlist in Elementor, you will need to use the Text Editor Widget.
Get Started
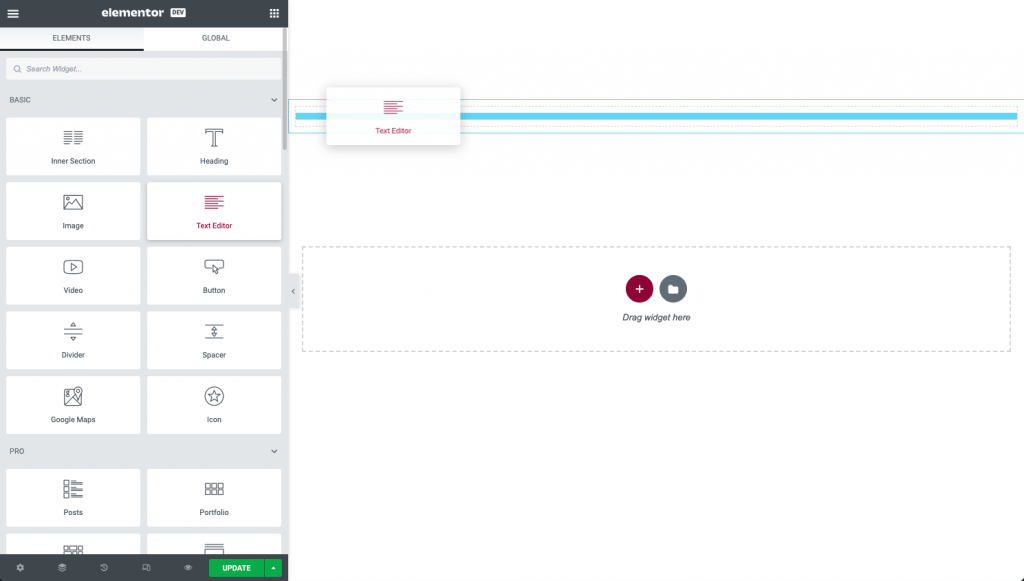
- From the Basic Widget library, drag a Text Editor Widget to your page in the desired location
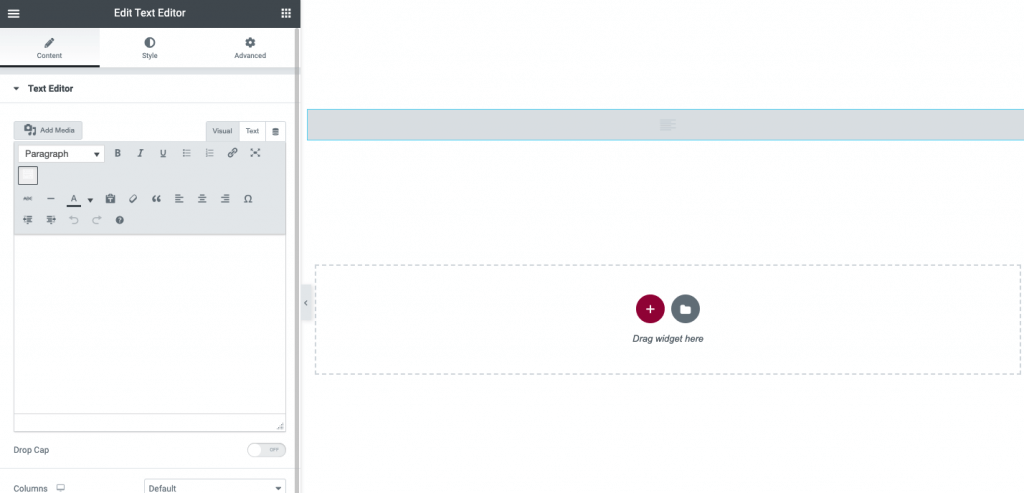
- Click the Add Media button in the Text Editor controls
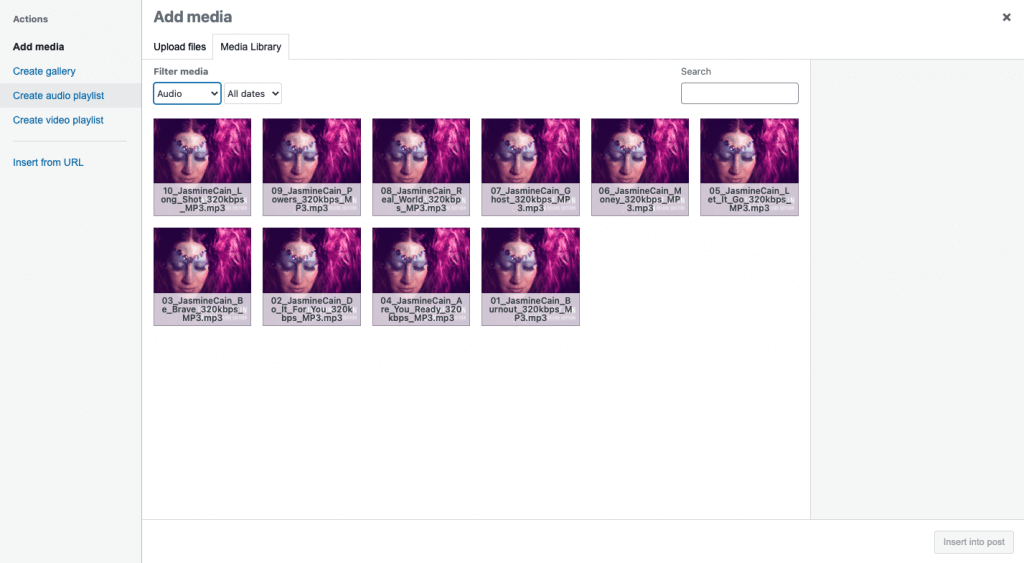
- Select the Create audio playlist from the options on the left
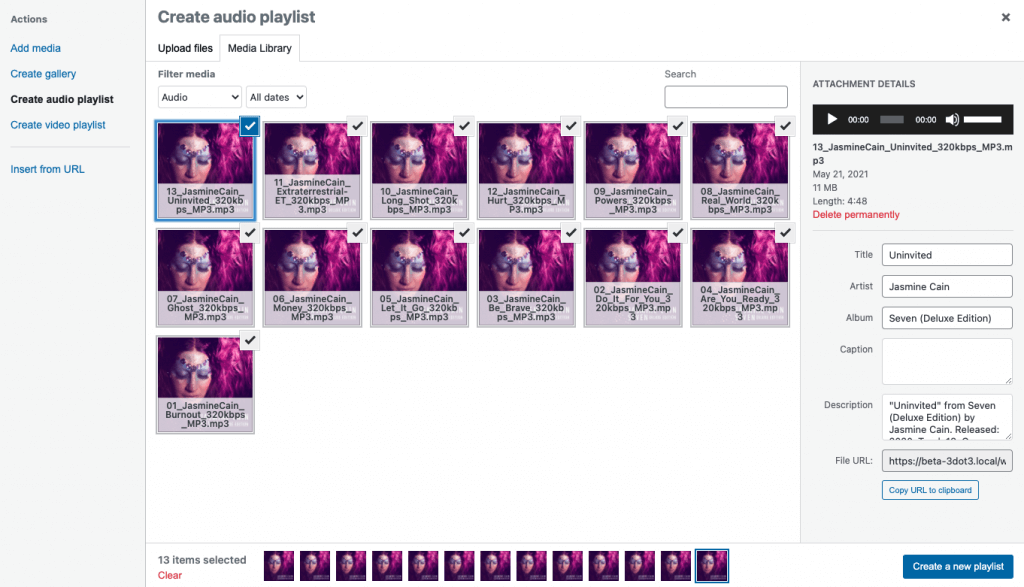
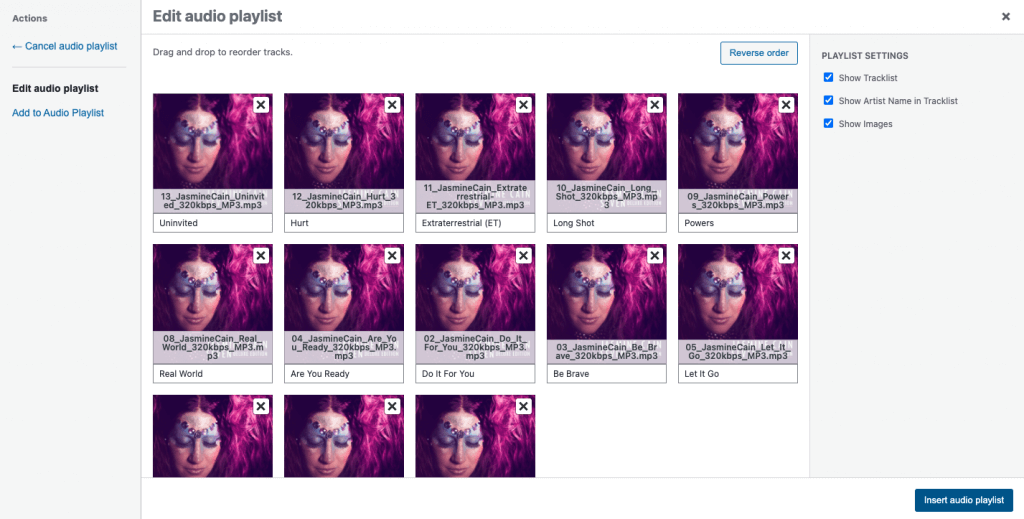
- Select the files you wish to be included in your playlist and click the “Create a new playlist” button in lower corner
- Select the playlist settings you wish to include. The track titles can also be edited at this time. Click the “Insert audio playlist” button in the lower corner
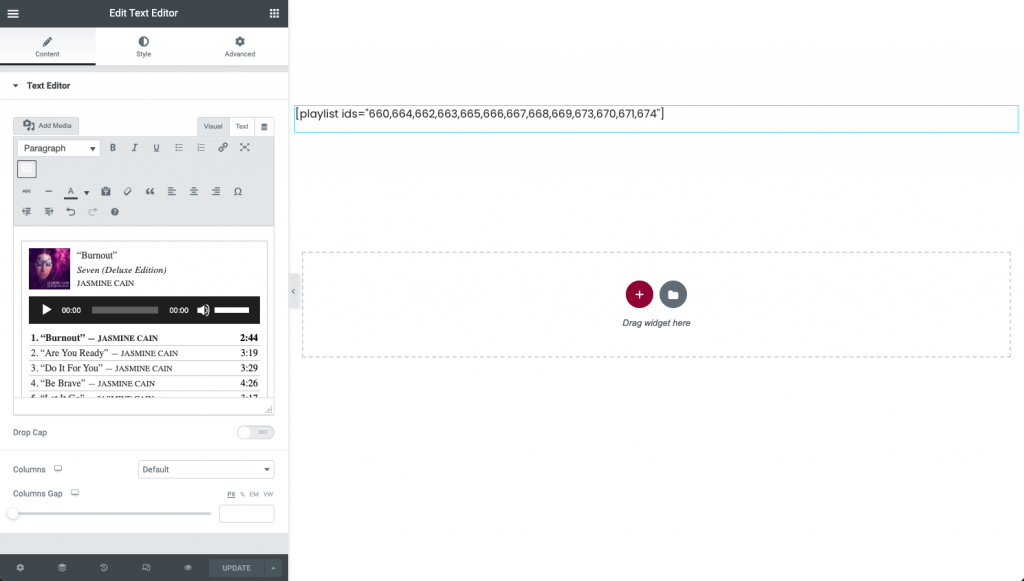
- You will now see the playlist in the editor panel. It will not show in the main window but be displayed as the shortcode. This is normal and will only show on the live page
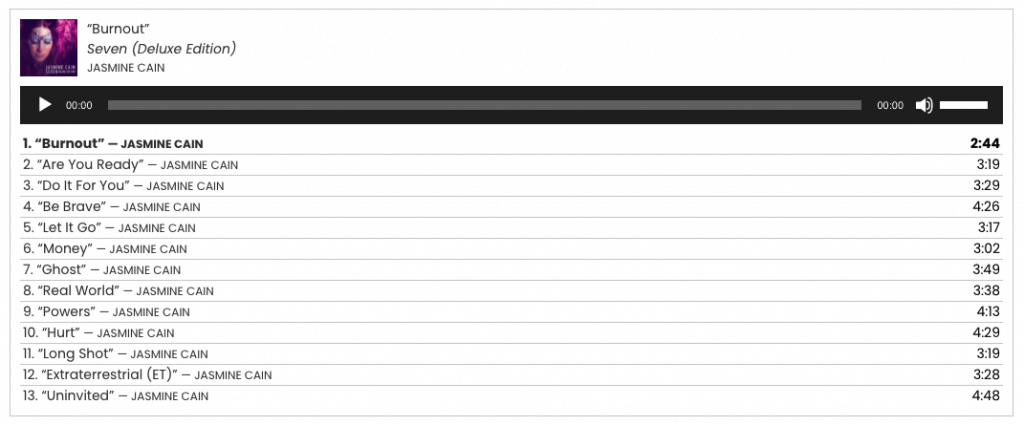
- Publish or Update your page and view from the preview icon or in another tab. Your audio playlist should be visible and working
Tip: Video Playlists may be created using the same steps above.
Note: Since this uses the media library and is stored in the uploads folder, the files can be downloaded by users using the developer tools or inspecting the code. It is recommended to upload clips or lower quality files if important to protect this from occurring.